6 Best Places to Put Adsense Ads in Blogger postheadericon

This article will discuss about the more common 10 places on our blog where we can place ads and about how to implement them and also which are the most suitable formats based on those available in our AdSense account.
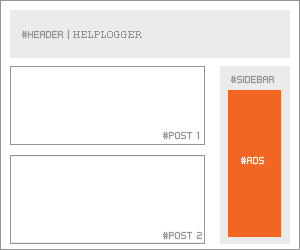

In the Sidebar

10 Best Places to Put Adsense Ads in Blogger

How to implement.

This is one of the easiest places to place AdSense. Just go to the page elements (layout), click on the "Add a Gadget" link and add an HTML/Javascript widget with your ad code inside it or add directly an AdSense widget.

Recommended formats: 125 × 125, 120 × 600 and 160 × 600
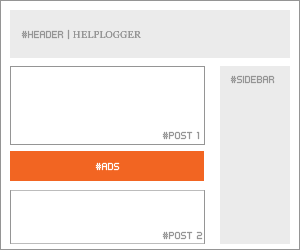

Between posts

10 Best Places to Put Adsense Ads in Blogger


 Implementation. You can implement AdSense ads between your posts: go to Layout, click on the "Edit" link below the Blog Posts section, then check the "Show Ads Between Posts" option.

Recommended formats: 468 × 60, 300 × 250 and 336 × 280
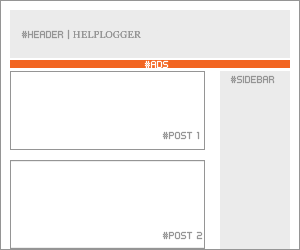

Under the header
 

10 Best Places to Put Adsense Ads in Blogger
Implementation:

Firstly, convert your AdSense ad code. You can use this converter here:
AdSense Ad Converter

Then, go to your Blogger Template (from your Dashboard, click on Template and press the Edit HTML button) and search for:


<div id='header-wrapper'>

Then paste the converted code right after it.

Recommended formats: 728 × 90 and 728 × 15


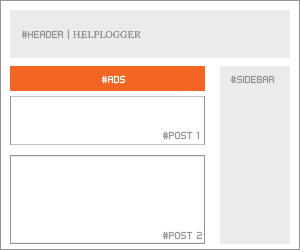
Above the blog posts

10 Best Places to Put Adsense Ads in Blogger
Implementation:

Convert your ad code and search for <div id='main-wrapper'> in your template.

Paste the converted code right after it.

Recommended formats: 460 × 68, 468 × 15 and 336 × 280


In the posts' footer 


10 Best Places to Put Adsense Ads in Blogger
 
Implementation:

Convert your ad code and then go to your Template, Expand Widget Templates and look for:


<p class='post-footer-line post-footer-line-3'/>

Note: if you can't find it, search it without the trailing slash /

Paste the converted code right after this line.

Recommended formats: 468x68 and 468x15


Between post and comments (visible only on posts pages)

10 Best Places to Put Adsense Ads in Blogger
Implementation:

Convert your ad code and then go to your Template, Expand Widget Templates and look for:

</b:includable>
<b:includable id='commentDeleteIcon' var='comment'>

Paste the converted code just above it, following this example:

<b:if cond='data:blog.pageType == "item"'>

<!-- Here comes your ad code -->

</b:if>

Recommended formats: 468x60, 300x250 and 336x280


FAQ

I anticipated some questions likely to arise:

I can't find the codes, what should I do?
Always check the "Expand Widget Templates" checkbox. These are the default codes of Blogger and should be found in all the templates unless they have been changed by a hack or the template designer.

Why should I convert my AdSense code?
The Blogger's Template reads it as text and not as code and it is good to avoid any errors when trying to save it.

The ads are not displaying properly, why is that?
The ads could be affected by the styles (CSS) selectors (divs) containing them and some templates could be wrong designed, then you should consider modifying these styles, look for another relevant place or in extreme cases, change the template.

Can I put the all 10 codes on my blog?
No, you should choose just one of the places where you want to put the ads considering that AdSense have some limits on the number of ads that could be displayed. Try to make a balance with your content.

Why we there should be only 3 ads displayed on the main page?
Is due to the limit set by the AdSense. Combine the type of ads (text, rich media ads and link units) to be able to show the number of ads you want.

Hopefully, this will be useful to those of you wanting to display AdSense ads on your blog.

Cool Rounded Related Posts Widget With Thumbnail or Summary For Blogger postheadericon

Cool Rounded Related Posts Widget With Thumbnail or Summary For Blogger
There are several tutorials quite old which have explained different methods for displaying related posts in Blogger but in this tutorial, I will show you how to implement a very beautiful Related Posts widget that comes along with Thumbnails and Posts Snippets, as well. If you want to add it, follow the next steps below:

Step 1. From your Blogger Dashboard, go to Template and click on Edit HTML

 
Cool Rounded Related Posts Widget With Thumbnail or Summary For Blogger
 

Step 2. Tick the "Expand Widget Templates" checkbox:

 
Cool Rounded Related Posts Widget With Thumbnail or Summary For Blogger


Step 3. Find (CTRL + F) this tag:

</head>

...and paste the following code just above it:
<script type='text/javascript'>
//<![CDATA[
var relatedTitles = new Array();
var relatedUrls = new Array();
var relatedpSummary = new Array();
var relatedThumb = new Array();
var relatedTitlesNum = 0;

var relatedPostsNum = 4; // number of entries to be shown
var relatedmaxnum = 75; // the number of characters of summary
var relatednoimage = "https://blogger.googleusercontent.com/img/b/R29vZ2xl/AVvXsEgCo0kHG-O4GXJWQaQ5Tly_mfinexK0L4pmA_u2jIJOf5Ls57dvdSJs-HyGpdJGVN6K-g-EIkjV9ZkHvQk0YqFb_2Oc0JWGpFRoqERSrhmYLyLqmK47hSwc1Upm3MFPKFvSrJXTREe5J8UL/s1600/no_image.jpg"; // default picture for entries with no image

function readpostlabels(json) {
  var entry, postimg, postcontent, cat;
  for (var i = 0; i < json.feed.entry.length; i++) {
    entry = json.feed.entry[i];
    if (i==json.feed.entry.length) { break; }
    relatedTitles[relatedTitlesNum] = entry.title.$t;
    postcontent = "";
    if ("content" in entry) {
      postcontent = entry.content.$t;
    } else if ("summary" in entry) {
      postcontent = entry.summary.$t;
    }
    relatedpSummary[relatedTitlesNum] = removetags(postcontent,relatedmaxnum);
    if ("media$thumbnail" in entry) {
      postimg = entry.media$thumbnail.url;
    } else {
      postimg = relatednoimage;
    }
    relatedThumb[relatedTitlesNum] = postimg;
    for (var k = 0; k < entry.link.length; k++) {
      if (entry.link[k].rel == 'alternate') {
        relatedUrls[relatedTitlesNum] = entry.link[k].href;
        break;
      }
    }
    relatedTitlesNum++;
  }
}
function showrelated() {
  var tmp = new Array(0);
  var tmp2 = new Array(0);
  var tmp3 = new Array(0);
  var tmp4 = new Array(0);
  for(var i = 0; i < relatedUrls.length; i++) {
    if(!contains(tmp, relatedUrls[i])) {
      tmp.length += 1; tmp[tmp.length - 1] = relatedUrls[i];
      tmp2.length += 1; tmp2[tmp2.length - 1] = relatedTitles[i];
      tmp3.length += 1; tmp3[tmp3.length - 1] = relatedpSummary[i];
      tmp4.length += 1; tmp4[tmp4.length - 1] = relatedThumb[i];
    }
  }
  relatedTitles = tmp2; relatedUrls = tmp; relatedpSummary = tmp3; relatedThumb = tmp4;
  for(var i = 0; i < relatedTitles.length; i++){
    var index = Math.floor((relatedTitles.length - 1) * Math.random());
    var tempTitle = relatedTitles[i]; var tempUrls = relatedUrls[i];
    var tempResum = relatedpSummary[i]; var tempImage = relatedThumb[i];
    relatedTitles[i] = relatedTitles[index]; relatedUrls[i] = relatedUrls[index];
    relatedpSummary[i] = relatedpSummary[index]; relatedThumb[i] = relatedThumb[index];
    relatedTitles[index] = tempTitle; relatedUrls[index] = tempUrls;
    relatedpSummary[index] = tempResum; relatedThumb[index] = tempImage;
  }
  var somePosts = 0;
  var r = Math.floor((relatedTitles.length - 1) * Math.random());
  var relsump = r;
  var output;
  var dirURL = document.URL;

  while (somePosts < relatedPostsNum) {
    if (relatedUrls[r] != dirURL) {

      output = "<div class='relatedsumposts'>";
      output += "<a href='" + relatedUrls[r] + "' rel='nofollow'  target='_self' title='" + relatedTitles[r] + "'><img src='" + relatedThumb[r] + "' /></a>";
      output += "<h6><a href='" + relatedUrls[r] + "' target='_self'>" + relatedTitles[r] + "</a></h6>";
      output += "<p>" + relatedpSummary[r] + " ... </p>";
      output += "</div>";
      document.write(output);
     
      somePosts++;
      if (somePosts == relatedPostsNum) { break; }
    }
    if (r < relatedTitles.length - 1) {

      r++;
    } else {
     
      r = 0;
    }

    if(r==relsump) { break; }
  }
}
function removetags(text,length){
  var pSummary = text.split("<");
  for(var i=0;i<pSummary.length;i++){
    if(pSummary[i].indexOf(">")!=-1){
      pSummary[i] = pSummary[i].substring(pSummary[i].indexOf(">")+1,pSummary[i].length);
    }
  }
  pSummary = pSummary.join("");
  pSummary = pSummary.substring(0,length-1);
  return pSummary;
}
function contains(a, e) {
  for(var j = 0; j < a.length; j++) if (a[j]==e) return true;
  return false;
}
//]]>
</script>
Note:  
  • To change the number of posts that are being displayed, modify the value in red (4)
  • To change the number of characters to be shown in posts summary, modify the value in green (75)
  • To change the default pic for posts with no images, add your URL instead of the one marked in blue

... also paste the code below just above the </head> tag:
<style>
.relatedsumposts {
  float: left;
  margin: 0px 5px;
  overflow: hidden;
  text-align: center;
  /* width and height of the related posts area */
  width: 120px;
  height: 210px;
}

.relatedsumposts:hover {
background-color: #F3F3F3; -webkit-border-radius: 10px;
-moz-border-radius: 10px;
border-radius: 10px;
}

.relatedsumposts img:hover {
-khtml-opacity:0.4;
-moz-opacity:0.4;
opacity:0.4;
}

.relatedsumposts a {
  /* link properties */
color: #linkcolor;
  display: inline;
  font-size: 10px;
  line-height: 1;
}
.relatedsumposts img {
  /* thumbnail properties */
margin-top: 2px;
  height: 82px;
  padding: 5px;
  width: 82px;
border: 1px solid #fff;
-webkit-border-radius: 100px;
-moz-border-radius: 100px;
border-radius: 100px;
-webkit-box-shadow: 0 1px 2px rgba(0, 0, 0, .4);
-moz-box-shadow: 0 1px 2px rgba(0, 0, 0, .4);
box-shadow: 0 1px 2px rgba(0, 0, 0, .4);
}
.relatedsumposts h6 {
  /* title properties */
  display: table-cell;
  height: 5em;
  margin: 5px 0 0;
  overflow: hidden;
  padding-bottom: 2px;
  vertical-align: middle;
  width: 130px;
}

.relatedsumposts p {
  /* summary properties */
border-top: 1px dotted #777777;
border-bottom: 1px dotted #777777;
color: #summarycolor;
  font-size: 10px;
  height: 4em;
  line-height: 1;
  margin: 5px 0 0;
  overflow: hidden;
  padding: 5px 0 15px 0;
  text-align: left;
}
</style>
Note:  
  • Modify the values in red to adjust the width (120) and height (210) of the widget area
  • Replace #linkcolor with the hex value of your color to change the color of post titles
  • To change the size of thumbnails, modify the values marked in violet (82)
  • To determine the border roundness, modify the values in orange (100)
  • To change the color of the post snippet, change #summarycolor with color hex value

Step 4. Search (CTRL + F) for the following fragment:

<a expr:href='data:label.url' rel='tag'><data:label.name/></a><b:if cond='data:label.isLast != &quot;true&quot;'>,</b:if>

... and add this code just below it:

<b:if cond='data:blog.pageType == &quot;item&quot;'>
    <script expr:src='&quot;/feeds/posts/default/-/&quot; + data:label.name + &quot;?alt=json-in-script&amp;callback=readpostlabels&amp;max-results=50&quot;' type='text/javascript'/>
  </b:if>

The entire fragment should look like this:

          <b:loop values='data:post.labels' var='label'>
            <a expr:href='data:label.url' rel='tag'><data:label.name/></a><b:if cond='data:label.isLast != &quot;true&quot;'>,</b:if>
<b:if cond='data:blog.pageType == &quot;item&quot;'>
    <script expr:src='&quot;/feeds/posts/default/-/&quot; + data:label.name + &quot;?alt=json-in-script&amp;callback=readpostlabels&amp;max-results=50&quot;' type='text/javascript'/>
  </b:if>

          </b:loop>

Step 5. Find this fragment of code:

</b:includable>
<b:includable id='postQuickEdit' var='post'>

Note: if you can't find it, then search only for the code in red

...add just ABOVE it, add the following:

<b:if cond='data:blog.pageType == &quot;item&quot;'>
  <div class='post-footer-line post-footer-line-4'>
    <div id='relatedpostssum'><div style='text-align: left; font-size: 15px; margin-bottom: 10px; font-weight: bold;'>RELATED POSTS</div>
      <script type='text/javascript'>showrelated();</script>
    </div>
    <div style='clear:both;'/>
  </div>
</b:if>
Cool Rounded Related Posts Widget With Thumbnail or Summary For Blogger

 Step 6. Save your Template... and hopefully we're done...

Show Recent Post With Thumbnail For Label or Categories Of Your Blog postheadericon

Show Recent Post With Thumbnail For Label or Categories Of Your Blog
Sometimes we want to have everything organized so that our readers can find topics of interest more easily, and that's when instead of putting a widget with the latest posts, we can put together the latest entries sorted by category, so that we'll be able to show the latest posts for each label we want and also display a thumbnail for our category.


To add this cool gadget/widget for the latest categories, just follow the next steps:

Steps

Step 1. From your Blogger Dashboard, go to Template/Edit HTML
  

Show Recent Post With Thumbnail For Label or Categories Of Your Blog


...then tick the Expand Widget Templates checkbox:


Show Recent Post With Thumbnail For Label or Categories Of Your Blog


Step 2. Search for this piece of code:

]]></b:skin>

and just above it, paste this one:

/* Recent posts by labels
--------------------------------- */
img.label_thumb{
float:left;
margin-right:10px !important;
height:65px; /* Thumbnail height */
width:65px; /* Thumbnail width */
border: 1px solid #fff;
-webkit-border-radius: 10px;
-moz-border-radius: 10px;
border-radius: 10px;
-webkit-box-shadow: 0 1px 1px rgba(0, 0, 0, .4);
-moz-box-shadow: 0 1px 1px rgba(0, 0, 0, .4);
box-shadow: 0 1px 1px rgba(0, 0, 0, .4);
}

.label_with_thumbs {
float: left;
width: 100%;
min-height: 70px;
margin: 0px 10px 2px 0px;
padding: 0;
}
ul.label_with_thumbs li {
padding:8px 0;
min-height:65px;
margin-bottom:0px;
border-bottom: 1px dotted #999999;
}

.label_with_thumbs li{
list-style: none ;
padding-left:0px !important;
}

.label_with_thumbs a { text-transform: uppercase;}
.label_with_thumbs strong {padding-left:0px; }

Step 3. Now search for this tag (CTRL + F)

</head>

...and add the following script above it:

<script type='text/javascript'>
//<![CDATA[
function labelthumbs(json){document.write('<ul class="label_with_thumbs">');for(var i=0;i<numposts;i++){var entry=json.feed.entry[i];var posttitle=entry.title.$t;var posturl;if(i==json.feed.entry.length)break;for(var k=0;k<entry.link.length;k++){if(entry.link[k].rel=='replies'&&entry.link[k].type=='text/html'){var commenttext=entry.link[k].title;var commenturl=entry.link[k].href;}
if(entry.link[k].rel=='alternate'){posturl=entry.link[k].href;break;}}var thumburl;try{thumburl=entry.media$thumbnail.url;}catch(error)
{s=entry.content.$t;a=s.indexOf("<img");b=s.indexOf("src=\"",a);c=s.indexOf("\"",b+5);d=s.substr(b+5,c-b-5);if((a!=-1)&&(b!=-1)&&(c!=-1)&&(d!="")){thumburl=d;}else thumburl='https://blogger.googleusercontent.com/img/b/R29vZ2xl/AVvXsEhoh-P8x9ao_c3LqIBsLAb858Oo8C7BXbd_KMZCKoxPqkWc5-b04GYuhqqqT1LyocVFSdgiHAudROjTqENlqtaT08CmJM_-AueGL37oN8908Y3KMRTHU9KxrLGIiMUWTk4j17q_JxZDbDo/s1600/picture_not_available.png';}
var postdate=entry.published.$t;var cdyear=postdate.substring(0,4);var cdmonth=postdate.substring(5,7);var cdday=postdate.substring(8,10);var monthnames=new Array();monthnames[1]="Jan";monthnames[2]="Feb";monthnames[3]="Mar";monthnames[4]="Apr";monthnames[5]="May";monthnames[6]="June";monthnames[7]="July";monthnames[8]="Aug";monthnames[9]="Sept";monthnames[10]="Oct";monthnames[11]="Nov";monthnames[12]="Dec";document.write('<li class="clearfix">');if(showpostthumbnails==true)
document.write('<a href="'+posturl+'" target ="_top"><img class="label_thumb" src="'+thumburl+'"/></a>');document.write('<strong><a href="'+posturl+'" target ="_top">'+posttitle+'</a></strong><br>');if("content"in entry){var postcontent=entry.content.$t;}
else
if("summary"in entry){var postcontent=entry.summary.$t;}
else var postcontent="";var re=/<\S[^>]*>/g;postcontent=postcontent.replace(re,"");if(showpostsummary==true){if(postcontent.length<numchars){document.write('');document.write(postcontent);document.write('');}
else{document.write('');postcontent=postcontent.substring(0,numchars);var quoteEnd=postcontent.lastIndexOf(" ");postcontent=postcontent.substring(0,quoteEnd);document.write(postcontent+'...');document.write('');}}
var towrite='';var flag=0;document.write('<br>');if(showpostdate==true){towrite=towrite+monthnames[parseInt(cdmonth,10)]+'-'+cdday+' - '+cdyear;flag=1;}
if(showcommentnum==true)
{if(flag==1){towrite=towrite+' | ';}
if(commenttext=='1 Comments')commenttext='1 Comment';if(commenttext=='0 Comments')commenttext='No Comments';commenttext='<a href="'+commenturl+'" target ="_top">'+commenttext+'</a>';towrite=towrite+commenttext;flag=1;;}
if(displaymore==true)
{if(flag==1)towrite=towrite+' | ';towrite=towrite+'<a href="'+posturl+'" class="url" target ="_top">More »</a>';flag=1;;}
document.write(towrite);document.write('</li>');if(displayseparator==true)
if(i!=(numposts-1))
document.write('');}document.write('</ul>');}
//]]>
</script>

Note: to add your own pic for the posts with no thumbnail, replace the image url in blue with your own

So we have added the Css to style the widget and the script to make it work. Now all we have to do is to add the widget's code to the blog sidebar in a Html/Javascript gadget:

Step 4. Go to Layout - click on Add a Gadget

Show Recent Post With Thumbnail For Label or Categories Of Your Blog

Step 5. Choose the HTML/Javascript widget and paste this code inside the empty box:

<script type='text/javascript'>var numposts = 3;var showpostthumbnails = true;var displaymore = false;var displayseparator = true;var showcommentnum = false;var showpostdate = false;var showpostsummary = true;var numchars = 100;</script>
<script type="text/javascript" src="/feeds/posts/default/-/Name-of-the-label?published&alt=json-in-script&callback=labelthumbs"></script>

Note: Where it says Name-of-the-label is the name of the label you want to display, and if your label is case sensitive, like in my example, then you should type it that way.

Also within the last code, there are parts that we can customize, just change true with false or vice versa:

var numposts ← Number of posts to display
var showpostthumbnails ← Show/hide thumbnails
var displaymore ← Show or hide the read more link
var displayseparator ← Show/hide separator
var showcommentnum ← Show/hide the number of comments
var showpostdate ← Show/hide the posts dates
var showpostsummary ← Show or not the posts summaries
var numchars ← Number of posts characters (here you have to change the 100 value)

Remember that the gadget displays the latest posts from a particular label, therefore, if you want to display the latest posts from other labels then just repeat step 5 for each additional category you want to add.

Add a Social Media Icon to Blogger Header postheadericon

This tutorial will help you to add social media icons in the top right corner of the page which could increases the likelihood that readers can follow through the various social networks. There are several ways to do this, like adding a new widget section to the blog header but now, we'll do it using an unordered list that uses icons of Facebook, Twitter, Google+ and blog feed, and as a bonus, the icons will rotate when you hover over them.


Step 1. From your Blogger dashboard, go to Template and click on the Edit HTML button:


blogger blogspot, blogger template, blogger gadgets

Step 2. To expand the style, click on the small arrow on the left of <b:skin>...</b:skin> (screenshot 1), then click anywhere inside the code area to search (using CTRL + F) for the ]]></b:skin> tag (screenshot 2) and add this code just above it:

 /* Social icons for Blogger
----------------------------------------------- */

#social-icons {
margin-bottom:-30px;
height:50px;
width:100%;
display:block;
clear:both;
z-index: 2;
position: relative;
}
.social-media-icons {
display:table
}
.social-media-icons ul {
text-align:right;
padding:5px 5px 0 0
list-style-image:none;
list-style-position:outside;
list-style-type:none;
}
.social-media-icons ul {
margin-bottom:0;
padding:0;
float:right;
}
.social-media-icons li.media_icon {
margin-left:6px;
padding-left:0 !important;
background:none !important;
display:inline;
float:left;
}
.social-media-icons li:hover {
-moz-transform: rotate(360deg);
-webkit-transform: rotate(360deg);
-o-transform: rotate(360deg);
transform: rotate(-360deg);
-moz-transition: all 0.5s ease-in-out;
-webkit-transition: all 0.5s ease-in-out;
-o-transition: all 0.5s ease-in-out;
-ms-transition: all 0.5s ease-in-out;
transition: all 0.5s ease-in-out;
}

Add a Social Media Icon to Blogger Header

Add a Social Media Icon to Blogger Header

Step 3. Now search for this line


<b:section class='header' id='header' maxwidgets='1' showaddelement='no'>

Step 4. And just above it, add this code:

<div class='social-media-icons' id='social-icons'>
<ul>

<li class='media_icon'><a href='http://facebook.com/username'><img border='0' src='https://blogger.googleusercontent.com/img/b/R29vZ2xl/AVvXsEip45SPNSm0DTgDBcCMSKRTUUa4OU4mNWAUpbG3997ONlWxHfMGGFqRGhMQXf4zcuqDHOTEp4ymw8FoO6-yGZffA8TLP3WfRv79wQpkX4CiMApK2NrHxQ4DQR09bu3IL6vRT7ABvAcl0Sw/s1600/Facebook.png'/></a></li>

<li class='media_icon'><a href='http://twitter.com/#!/username'><img border='0' src='https://blogger.googleusercontent.com/img/b/R29vZ2xl/AVvXsEjNXsBBCxbsxyfEN0qtfAUqhMGtD1PcElP6tR6myh1g4ED-9WGSzss7qIP9RzGdpf5g_loeQ6vYYmnzrdSXl8eCshBSiY_gb4VpheRUwNXn5lwLEaRz7-uAr2dnnuy_H_Eab5PbmxG60ic/s1600/Twitter.png'/></a></li>

<li class='media_icon'><a href='https://plus.google.com/XXXXXXXXXXXXXXXXXX/about'><img border='0' src='https://blogger.googleusercontent.com/img/b/R29vZ2xl/AVvXsEj4YfBUlHcXUZSLT1AXFDrPAiBbXoh1Q5D3DeHZ_sUb6ZM_7mBOUqTdROIfIYgeSbML5nx4r96uqShVkN68HmDsRYKZXZl-YL2i7hwSGWnCH4RHAS3aUYtvnFHXHwzW3p24rekk-RLLARg/s1600/googleplus.png'/></a></li>

<li class='media_icon'><a href='http://name-of-your-blog.com/feeds/posts/default'><img border='0' src='https://blogger.googleusercontent.com/img/b/R29vZ2xl/AVvXsEj8VFbIZUofctTYKZdjUYtp7tS7vhsQKNadhtoX4ZCeu_ww16onWmQX29rLIWnjBxGJy4jT3bln34SjrhivfCXHWf7GdbH_PRSJAhEleBhLsu2m3o2Se7r7d73wDWTPx3SgI5MifuLbKoE/s1600/RSS.png'/></a></li>

</ul></div>

Customization

- Change what's in red with your usernames and id: the first is your Facebook username, the second is that of Twitter, in the third you should change the X by the ID of your Google+ profile and in the fourth you will put the name of your blog.
- To change the icons, just replace the urls in blue with the ones of your images.
- You can add more icons if you want, you just have to add before </ul></div> a line like this for each extra icon you want:

<li class='media_icon'><a href='Link URL'><img border='0' src='Image URL'/></a></li>

Step 5. Finally, Save the Template to apply the changes.

The effect is done with CSS3, so this effect will not work in older browsers.

How to Add Fade In/Out Page Loading Effect On Blogger Blog postheadericon

How to Add Fade In/Out Page Loading Effect On Blogger Blog
A very common effect in jQuery is the fade effect that hides or shows an element by fading it, and we can use it in many ways as for example in the blog's navigation. The following script does just that, by loading the page with a fading effect when we browse on internal links that are in the blog, such as post titles, labels links, archive, navigation links, etc..


You can see an example in this demo blog, click on the title of any post and see the fading effect when the page is loading.


How To Implement the Fade In Loading Effect

1) To put this fading effect on your blog, go to your Template > Edit HTML :

2) Click anywhere inside the code area and search for the </head> tag using CTRL + F keys:


How to Add Fade In/Out Page Loading Effect On Blogger Blog
3) Then, just above </head> add the following code:

<script src='http://ajax.googleapis.com/ajax/libs/jquery/1.8.2/jquery.min.js' type='text/javascript'/>
<script type='text/javascript'>
//<![CDATA[
$(document).ready(function() {
$("body").css("z-index", "-10");
$("body").fadeIn(0);

$("a").click(function(event){
event.preventDefault();
linkLocation = this.href;
$("body").fadeOut(500, redirectPage); });
function redirectPage() {
window.location = linkLocation;
}
});
//]]>
</script>
<style>
html {
background-color: #F2F2F2; /* Color fading */
}
</style>
4) Save the changes and that's it. In green you can see where to change the color that fades on a loading page.

The original script hides the body of the page while loading, I prefer to change that property with a negative z-index to avoid problems with the search engine robots that may effect the positioning.

Problems?

Consider that such effects could increase the blog loading time, so I recommend using it only when your blog loads fast and does not have too many scripts.

If you already use another version of jQuery remove the other, leaving only this which will be readed first.

If you are using Mootools or Scriptaculous, then you have to make some modifications to the code in order to be compatible.

If you have another script with a fade effect, then it could interfere with this and you might not see anything on the page except the color fading, in such cases it is better without this script.

You can also use this effect only on some links, for example, if you want to appear only when you click on the post titles in the navigation links (older posts and newer posts), and on the top tabs, then replace this line:
$("a").click(function(event){
With this:
$(".post-title a, .blog-pager-older-link, .blog-pager-newer-link, .tabs").click(function(event){
In some cases, the page can load for a second and then load with the fade effect, this may be "normal" because the browser is slow to read the script on page load.

Apart from these drawbacks, I think it's a very elegant way to load blog pages while browsing them, don't you think?

How to Embed a Youtube Playlist on Your Blogger Blog postheadericon

In this post we will see how to create a YouTube video gallery using jQuery. It is an elegant gallery in which we can add 5 videos and for its dimensions, we could put it below the blog header. Actually you can put it anywhere, but it is recommended in that area considering that 765px is the width of the gallery.

How to Embed a Youtube Playlist on Your Blogger Blog


To add this video slider to your blog go to Template > Edit HTML and before the </head> tag, add these scripts:


<script>
//<![CDATA[
/*hoverscroll v.0.2.4*/
(function($) {
$.fn.hoverscroll = function(params) {
if (!params) { params = {}; }
params = $.extend({}, $.fn.hoverscroll.params, params);
this.each(function() {
var $this = $(this);
if (params.debug) {$.log('[HoverScroll] Trying to create hoverscroll on element ' + this.tagName + '#' + this.id);}
if (params.fixedArrows) {
$this.wrap('<div class="fixed-listcontainer"></div>')
}
else {
$this.wrap('<div class="listcontainer"></div>');
}

$this.addClass('list');
var listctnr = $this.parent();
listctnr.wrap('<div class="ui-widget-content hoverscroll' +
(params.rtl && !params.vertical ? " rtl" : "") + '"></div>');
//listctnr.wrap('<div class="hoverscroll"></div>');

var ctnr = listctnr.parent();

var leftArrow, rightArrow, topArrow, bottomArrow;
if (params.arrows) {
if (!params.vertical) {
if (params.fixedArrows) {
leftArrow = '<div class="fixed-arrow left"></div>';
rightArrow = '<div class="fixed-arrow right"></div>';

listctnr.before(leftArrow).after(rightArrow);
}
else {
leftArrow = '<div class="arrow left"></div>';
rightArrow = '<div class="arrow right"></div>';

listctnr.append(leftArrow).append(rightArrow);
}
}
else {
if (params.fixedArrows) {
topArrow = '<div class="fixed-arrow top"></div>';
bottomArrow = '<div class="fixed-arrow bottom"></div>';

listctnr.before(topArrow).after(bottomArrow);
}
else {
topArrow = '<div class="arrow top"></div>';
bottomArrow = '<div class="arrow bottom"></div>';

listctnr.append(topArrow).append(bottomArrow);
}
}
}
ctnr.width(params.width).height(params.height);

if (params.arrows && params.fixedArrows) {
if (params.vertical) {
topArrow = listctnr.prev();
bottomArrow = listctnr.next();

listctnr.width(params.width)
.height(params.height - (topArrow.height() + bottomArrow.height()));
}
else {
leftArrow = listctnr.prev();
rightArrow = listctnr.next();

listctnr.height(params.height)
.width(params.width - (leftArrow.width() + rightArrow.width()));
}
}
else {
listctnr.width(params.width).height(params.height);
}

var size = 0;

if (!params.vertical) {
ctnr.addClass('horizontal');
$this.children().each(function() {
$(this).addClass('item');

if ($(this).outerWidth) {
size += $(this).outerWidth(true);
}
else {
size += $(this).width() + parseInt($(this).css('padding-left')) + parseInt($(this).css('padding-right'))
+ parseInt($(this).css('margin-left')) + parseInt($(this).css('margin-right'));
}
});
$this.width(size);

if (params.debug) {
$.log('[HoverScroll] Computed content width : ' + size + 'px');
}
if (ctnr.outerWidth) {
size = ctnr.outerWidth();
}
else {
size = ctnr.width() + parseInt(ctnr.css('padding-left')) + parseInt(ctnr.css('padding-right'))
+ parseInt(ctnr.css('margin-left')) + parseInt(ctnr.css('margin-right'));
}

if (params.debug) {
$.log('[HoverScroll] Computed container width : ' + size + 'px');
}
}
else {
ctnr.addClass('vertical');
$this.children().each(function() {
$(this).addClass('item')

if ($(this).outerHeight) {
size += $(this).outerHeight(true);
}
else {
size += $(this).height() + parseInt($(this).css('padding-top')) + parseInt($(this).css('padding-bottom'))
+ parseInt($(this).css('margin-bottom')) + parseInt($(this).css('margin-bottom'));
}
});
$this.height(size);

if (params.debug) {
$.log('[HoverScroll] Computed content height : ' + size + 'px');
}
if (ctnr.outerHeight) {
size = ctnr.outerHeight();
}
else {
size = ctnr.height() + parseInt(ctnr.css('padding-top')) + parseInt(ctnr.css('padding-bottom'))
+ parseInt(ctnr.css('margin-top')) + parseInt(ctnr.css('margin-bottom'));
}

if (params.debug) {
$.log('[HoverScroll] Computed container height : ' + size + 'px');
}
}
var zone = {
1: {action: 'move', from: 0, to: 0.06 * size, direction: -1 , speed: 16},
2: {action: 'move', from: 0.06 * size, to: 0.15 * size, direction: -1 , speed: 8},
3: {action: 'move', from: 0.15 * size, to: 0.25 * size, direction: -1 , speed: 4},
4: {action: 'move', from: 0.25 * size, to: 0.4 * size, direction: -1 , speed: 2},
5: {action: 'stop', from: 0.4 * size, to: 0.6 * size},
6: {action: 'move', from: 0.6 * size, to: 0.75 * size, direction: 1 , speed: 2},
7: {action: 'move', from: 0.75 * size, to: 0.85 * size, direction: 1 , speed: 4},
8: {action: 'move', from: 0.85 * size, to: 0.94 * size, direction: 1 , speed: 8},
9: {action: 'move', from: 0.94 * size, to: size, direction: 1 , speed: 16}
}

ctnr[0].isChanging = false;
ctnr[0].direction = 0;
ctnr[0].speed = 1;
function checkMouse(x, y) {
x = x - ctnr.offset().left;
y = y - ctnr.offset().top;

var pos;
if (!params.vertical) {pos = x;}
else {pos = y;}

for (i in zone) {
if (pos >= zone[i].from && pos < zone[i].to) {
if (zone[i].action == 'move') {startMoving(zone[i].direction, zone[i].speed);}
else {stopMoving();}
}
}
}

function setArrowOpacity() {
if (!params.arrows || params.fixedArrows) {return;}

var maxScroll;
var scroll;

if (!params.vertical) {
maxScroll = listctnr[0].scrollWidth - listctnr.width();
scroll = listctnr[0].scrollLeft;
}
else {
maxScroll = listctnr[0].scrollHeight - listctnr.height();
scroll = listctnr[0].scrollTop;
}
var limit = params.arrowsOpacity;
var opacity = (scroll / maxScroll) * limit;

if (opacity > limit) { opacity = limit; }
if (isNaN(opacity)) { opacity = 0; }

var done = false;
if (opacity <= 0) {
$('div.arrow.left, div.arrow.top', ctnr).hide();
if(maxScroll > 0) {
$('div.arrow.right, div.arrow.bottom', ctnr).show().css('opacity', limit);
}
done = true;
}
if (opacity >= limit || maxScroll <= 0) {
$('div.arrow.right, div.arrow.bottom', ctnr).hide();
done = true;
}

if (!done) {
$('div.arrow.left, div.arrow.top', ctnr).show().css('opacity', opacity);
$('div.arrow.right, div.arrow.bottom', ctnr).show().css('opacity', (limit - opacity));
}
}

function startMoving(direction, speed) {
if (ctnr[0].direction != direction) {
if (params.debug) {
$.log('[HoverScroll] Starting to move. direction: ' + direction + ', speed: ' + speed);
}

stopMoving();
ctnr[0].direction = direction;
ctnr[0].isChanging = true;
move();
}
if (ctnr[0].speed != speed) {
if (params.debug) {
$.log('[HoverScroll] Changed speed: ' + speed);
}

ctnr[0].speed = speed;
}
}

function stopMoving() {
if (ctnr[0].isChanging) {
if (params.debug) {
$.log('[HoverScroll] Stoped moving');
}

ctnr[0].isChanging = false;
ctnr[0].direction = 0;
ctnr[0].speed = 1;
clearTimeout(ctnr[0].timer);
}
}

function move() {
if (ctnr[0].isChanging == false) {return;}

setArrowOpacity();

var scrollSide;
if (!params.vertical) {scrollSide = 'scrollLeft';}
else {scrollSide = 'scrollTop';}

listctnr[0][scrollSide] += ctnr[0].direction * ctnr[0].speed;
ctnr[0].timer = setTimeout(function() {move();}, 50);
}

if (params.rtl && !params.vertical) {
listctnr[0].scrollLeft = listctnr[0].scrollWidth - listctnr.width();
}

ctnr
.mousemove(function(e) {checkMouse(e.pageX, e.pageY);})
.bind('mouseleave', function() {stopMoving();});

this.startMoving = startMoving;
this.stopMoving = stopMoving;

if (params.arrows && !params.fixedArrows) {
// Initialise arrow opacity
setArrowOpacity();
}
else {
// Hide arrows
$('.arrowleft, .arrowright, .arrowtop, .arrowbottom', ctnr).hide();
}
});

return this;
};

if (!$.fn.offset) {
$.fn.offset = function() {
this.left = this.top = 0;

if (this[0] && this[0].offsetParent) {
var obj = this[0];
do {
this.left += obj.offsetLeft;
this.top += obj.offsetTop;
} while (obj = obj.offsetParent);
}

return this;
}
}

$.fn.hoverscroll.params = {
vertical: false,
width: 400,
height: 50,
arrows: true,
arrowsOpacity: 0.7,
fixedArrows: false,
rtl: false,
debug: false
};
$.log = function() {
try {console.log.apply(console, arguments);}
catch (e) {
try {opera.postError.apply(opera, arguments);}
catch (e) {}
}
};
})(jQuery);

$(function(){
$("#videoslider-tabs a").click(function(){
var container = $("#videoslider-content");
container.html("<img src='https://blogger.googleusercontent.com/img/b/R29vZ2xl/AVvXsEgzYntwVHwZQZJHstyK48nH6OfKGKFrCMrO_WT3srhDFNTLCOytnYYBXRqqPWDbtuBnjVxRrFTl9gOVhFbkQKvFrYfBa3pUE0ipWp1I1BnLMX6RDIy82XDH3D6l9GyC9zEAwde8GTsIcFBt/s1600/loading.png' class='loading-vid' />");
var id = $(this).attr("href").slice(1);
loadvideo(id);
return false;
});
$("#videoslider-tabs").hoverscroll({vertical:true,width:300,height:330,arrows:false});
$("#videoslider-tabs li").hover(function(){$(this).addClass("hover");},function(){$(this).removeClass("hover");});
loadvideo();
});

function loadvideo (hash){if(hash){hash = hash.slice(3);$("#videoslider-content").html(video[hash]);$("#videoslider-tabs li").removeClass("actVid");$("#videoslider-tabs a[href=#vid"+hash+"]").parent().addClass("actVid");}else{$("#videoslider-content").html(video[1]);$("#videoslider-tabs li").removeClass("actVid");$("#videoslider-tabs a[href=#vid1]").parent().addClass("actVid");}}
//]]>
</script>

Then add the styles before ]]></b:skin>

/* Video Gallery for Blogger
----------------------------------------------- */
#videoslider {
background:#000; /* Background color */
clear:both;
margin:0 auto;
padding:5px;
width:765px;
border-radius: 5px;
-moz-background-clip: padding;
-webkit-background-clip: padding-box;
background-clip: padding-box;
}
#videoslider, #videoslider-content, #videoslider-tabs {height:350px;overflow:hidden;}
#videoslider-content {color:#fff;float:left;text-align:center;width:460px;z-index:1;}
.loading-vid {display:block;margin:165px auto 0;}
#videoslider-tabs {float:right;width:300px;margin:0;}
#videoslider-tabs li {background:url(https://blogger.googleusercontent.com/img/b/R29vZ2xl/AVvXsEgErn89LG2B8JIPo7JvpkzpQNt5vgglRjftDEeyjKjy12fXWHcM5iHQRIfy3VsPOXVYWcCFC1LMM2aYsCsNNGDdUjXTnHho2wktM08HcXNWBW45RsB7zYfob80ZymkqarRVn6JZbbct9N2P/s1600/tab_backgr.jpeg) repeat-x top left;float:left;height:60px;padding:5px;width:290px;list-style:none;}
#videoslider-tabs li a {padding:0 !important;border:0 !important;}
#videoslider-tabs li.hover {background:#333;}
#videoslider-tabs li.actVid {background:#555;}
#videoslider-tabs li img.thumb-vid {background-color:#fff;float:left;height:52px;margin:0 8px 0 0;padding:5px;width:52px;}
#videoslider-tabs li span.vidTit {
display:block;
color:#CD332D; /* Titles color */
font-size:14px; /* Titles font size */
font-weight:bold;
text-decoration:none;
}
#videoslider-tabs li .vidDesc {
display:block;
color:#fff; /* Color of the description */
font-size:12px; /* Font size of the description */
font-weight:bold;
text-decoration:none;
}
#videoslider-tabs a {text-decoration:none;}
#videoslider-tabs li.actVid .vidDesc {color:#fff;}
.ui-widget-content{float:right;}
.tabs-outer {background-image: none !important;}
#videoslider-tabs li a:hover {background: none !important;}
Now in a HTML/Javascript gadget paste the structure of the slider, this is the one you should put under the header:
<script>
var video = [];
video[1] = '<iframe width="460" height="345" src="http://www.youtube.com/embed/video_ID_1" frameborder="0" allowfullscreen></iframe>';
video[2] = '<iframe width="460" height="345" src="http://www.youtube.com/embed/video_ID_2" frameborder="0" allowfullscreen></iframe>';
video[3] = '<iframe width="460" height="345" src="http://www.youtube.com/embed/video_ID_3" frameborder="0" allowfullscreen></iframe>';
video[4] = '<iframe width="460" height="345" src="http://www.youtube.com/embed/video_ID_4" frameborder="0" allowfullscreen></iframe>';
video[5] = '<iframe width="460" height="345" src="http://www.youtube.com/embed/video_ID_5" frameborder="0" allowfullscreen></iframe>';
</script>
<div id="videoslider">
<div id="videoslider-content"></div>
<ul id="videoslider-tabs">
<li><a href="#vid1"><img src="//i2.ytimg.com/vi/video_ID_1/default.jpg" class="thumb-vid" /><span class="vidTit">Video Name</span><span class="vidDesc">Video Description</span></a></li>

<li><a href="#vid2"><img src="//i2.ytimg.com/vi/video_ID_2/default.jpg" class="thumb-vid" /><span class="vidTit">Video Name</span><span class="vidDesc">Video Description</span></a></li>

<li><a href="#vid3"><img src="//i2.ytimg.com/vi/video_ID_3/default.jpg" class="thumb-vid" /><span class="vidTit">Video Name</span><span class="vidDesc">Video Description</span></a></li>

<li><a href="#vid4"><img src="//i2.ytimg.com/vi/video_ID_4/default.jpg" class="thumb-vid" /><span class="vidTit">Video Name</span><span class="vidDesc">Video Description</span></a></li>

<li><a href="#vid5"><img src="//i2.ytimg.com/vi/video_ID_5/default.jpg" class="thumb-vid" /><span class="vidTit">Video Name</span><span class="vidDesc">Video Description</span></a></li>

</ul>
</div>

Add the IDs of the videos, their names and their description and that's it. The description should be brief so you wont have space problems.
If you do not know how to get the ID of a video, then open the video on YouTube and look at the address bar... the last characters are the ID you need.


How to Embed a Youtube Playlist on Your Blogger Blog


Note that the ID of each video should be added two times, one is for displaying the video and one for the tabs thumbnail.

As this gallery works with jQuery we should make sure to not repeat the version of the script if we already have jQuery.

Adding a Youtube Video in the Background Of Your Blogger Blog postheadericon

Adding a Youtube Video in the Background Of Your Blogger Blog
Some of you might have wondered how to put a video to play in the blog's background, so that instead of having just a color or an image, to have a video. We can do this thanks to the jQuery plugin Tubular that lets you use a YouTube video as a background of a web page.

Although the result can be very original and attractive, I must say it has three drawbacks: they can not be silenced, if the video has ads, they will also appear, and it can slow the loading time of the blog, so if anyone wants to use it, may consider putting it only on special occasions, or on blogs that load very quickly.

Also it can be done in HTML5, the problem with this method is that you need to load the video in 3 different formats (.mp4, .webm and .ovg) along with a picture for browsers that do not support them, so this YouTube option seems more practical to me, despite the drawbacks.


You can see it working on this demo blog

Steps 

1. The first step is to just above the </head> tag, this script:

<script src='http://ajax.googleapis.com/ajax/libs/jquery/1.10.2/jquery.min.js' type='text/javascript'/>

<script type='text/javascript'>
//<![CDATA[
/* jQuery tubular plugin
|* by Sean McCambridge
|* http://www.seanmccambridge.com/tubular
|* Copyright 2012
|* licensed under the MIT License
|* Enjoy.
|*
|* Thanks,
|* Sean */

var videoWidth = 853;
var videoRatio = 16/9;
var defaultDiv = 'wrapper-video';

jQuery.fn.tubular = function(videoId,wrapperId) {
wrapperId = (typeof(wrapperId) == undefined) ? 'wrapper-video' : wrapperId;
t = setTimeout("resizePlayer()",1000);

jQuery('html,body').css('height','100%');
jQuery('body').prepend('<div id="yt-container" style="overflow: hidden; position: fixed; z-index: 1;"><div id="ytapiplayer">You need Flash player 8+ and JavaScript enabled to view this video.</div></div><div id="video-cover" style="position: fixed; width: 100%; height: 100%; z-index: 2;"></div>');
jQuery('#' + wrapperId).css({position: 'relative', 'z-index': 99});

var ytplayer = 0;
var pageWidth = 0;
var pageHeight = 0;
var videoHeight = videoWidth / videoRatio;
var duration;

var iframe = '<iframe id="myytplayer" width="' + videoWidth + '" height="' + videoHeight + '" src="http://www.youtube.com/embed/' + videoId + '?autoplay=1&controls=0&modestbranding=1&showinfo=0&hd=1&iv_load_policy=3&version=3&wmode=transparent&loop=1&playlist=' + videoId + '" frameborder="0" allowfullscreen></iframe>';

jQuery('#ytapiplayer').html(iframe);
jQuery(window).resize(function() {
resizePlayer();
});
return this;
}

function onYouTubePlayerReady(playerId) {
ytplayer = document.getElementById("myytplayer");
ytplayer.setPlaybackQuality('medium');
ytplayer.mute();
}

function resizePlayer() {
var newWidth = jQuery(window).width();
var newHeight = jQuery(window).height();
jQuery('#yt-container, #video-cover').width(newWidth).height(newHeight);
if (newHeight > newWidth / videoRatio) {
newWidth = newHeight * videoRatio;
}
jQuery('#myytplayer').width(newWidth).height(newWidth/videoRatio);
}

//]]>
</script>
And this one too:
<script type='text/javascript'>
//<![CDATA[
$().ready(function() {
$('body').tubular('61BLn00AN_w','wrapper-video');
});
//]]>
</script>
2. Then locate the <body> tag (CTRL + F)
Or if you are using a template from Template Designer, find this line:
<body expr:class='&quot;loading&quot; + data:blog.mobileClass'>
3. Under either of these two, add this:
<div id='wrapper-video'>
4. Now search for the </body> tag, and before it put this:
</div>
Save the changes and that's it. In red you must put the ID of Youtube video, the ID are the characters that appear at the end of the URL:

Remember: There is no option to mute, so if you don't want to have sound as in the demo blog, you have to choose a video that has no sound. I also recommend using a video in HD in case you don't want any black parts to show around it.

If you are using jQuery, remove other versions that you have to avoid duplication and have problems.

How to Add a Meta Description in to Blogger postheadericon

How to Add a Meta Description in to Blogger
An important part of a good SEO is the implementation of meta tags, which are commonly located in the header of our website, that are being, in the same time, invisible to users visiting the site. Well, to be more succinct, these tags have only one purpose: to include information about the page such as author name, date, key word, description, title, among others.

However, here we will only mention one, which is the meta description in Blogger. This description will appear as a fragment in the search results and as a description when sharing on Google+, Facebook and other social networks. A clear and precise description increases the chances of getting more clicks or visits.

As we will work only on the Blogger platform, here I will leave a little guide to easily add a meta description.


Meta Description in Blogger


The first thing we will do is going to our Blogger dashboard and from there, go to Settings > Search preferences > Meta Tags > Description and click on Edit.


How to Add a Meta Description in to Blogger


Then check the box "Yes" to enable search description. Finally, click the "Save Changes" button.


Adding Meta Description To individual Posts


Now we will focus on adding the meta description to individual pages. Simply edit the page or post, look for the Search Description setting, and there we enter the text and save by clicking the Done button.


How to Add a Meta Description in to Blogger


And that's it. However it is best to test if it works and we will do so with the MetaChecker online tool, where we only have to introduce the url of a post or page, click Analyze and then it will show the results, including a complete analysis of keywords, on-page seo , meta tags, URLs, current server status and a rating bar that goes from Horror to Excellent.

If none of the meta descriptions appear (rarely fails), we can do the process manually, but it requires us to touch a bit of code. In this case, go to Template > Edit HTML and insert before <b:skin><![CDATA[ the following code:

<b:if cond='data:blog.metaDescription != &quot;&quot;'>
  <meta expr:content='data:blog.metaDescription' name='description'/>
</b:if>
Of course, we will use again the previously mentioned tool to ensure that the description is placed correctly and if all goes well, our blog would be ready to face a good SEO.

Increase Your Blog Ranking in Alexa 2014 postheadericon

Increase Your Blog Ranking in Alexa 2014


The Alexa Rank in its time had a good importance for the SEO, however, these days is already losing its importance due to the changes in the algorithm that Google applies from time to time.

The network displays information about visitors of a website, which in turn classifies this in a ranking, also generates an estimated statistics about visitor traffic and links pointing to the website.

In a few words, the Alexa Rank does not directly affect SEO, but rather serves as a reference for measuring the traffic type, popularity by country and other metrics, although some companies that have a ranking below 100,000, whose purpose is to make room for their business are carried away by the web site.

For others more skeptical, the Alexa Rank is an essential part for search engine optimization and I will not contradict this, since everyone has their opinion on this aspect. If you would like to enrich or have a good Alexa Rank of your website, here I present some ways to do it and with short-term results.

Increase Your Blog Ranking in Alexa 2014


5 Ways to Increase the Alexa Rank


Daily Content: Try to publish at least 2 articles per day and within a month you will start to notice changes in alexa ranking, guaranteed.

Install Alexa Rank widgets: Besides notifying about the results of your alexa ranking, it also makes an estimation of the backlinks to your website. There are three types of widgets: button with ranking and links, the other one with the ranking only and finally a graph with daily records of visits. Traffic Widgets

Alexa Toolbar: From experience, I highly recommend installing the Alexa Toolbar, because when we access a website, Alexa takes it as important visit and thus, better results in the ranking. And of course, it will give you information about the links of a web site, popular pages, reviews, and more features.

Request a review: To calculate the alexa ranking of a website, besides taking the amount of daily and monthly visits, the number of reviews or opinions made with stars also play a role in the ranking. Ask your users or purchase alexa opinions about your website.

Number of backlinks: As I said earlier, the number of visits and reviews about your website used to calculate the alexa rank and the total number of quality backlinks, increase more the chances of achieving a favorable ranking for your website.

How to Add Google Analystic in Blogger Complete Tutorial 2014 postheadericon

How to Add Google Analystic in Blogger Complete Tutorial 2014
Google Analytics is a platform created with the purpose of helping us to track the number of visits and page views on our blog, which also uses several filters to check exactly from where the visitors are coming via standard or custom reports.

Google Analytics is the leading free tool that has a good relationship with the internet marketing and offers suggestions and improvements or benefits for our website.

As Analytics is part of the variety of Google tools like Blogger, many bloggers still don't know if it is possible to add the tracking code in Blogger. Implementing analytics in Blogger is very quick and easy, so you don't need to be experts or web developers. Here's a small guide for placing the Google Analytics tracking ID on our blog.


Implementing Google Analytics on Blogger


1. Do you have a Google Analytics account? Then it's perfect. If you don't have one, please Register.
2. Within the account, we'll go to Admin and in the Property column, click the menu, then click Create new property, where we enter the information from the website.


How to Add Google Analystic in Blogger Complete Tutorial 2014


3. Click on "Get Tracking ID" and it will provide a box with a code, select and copy the code (CTRL + C).


How to Add Google Analystic in Blogger Complete Tutorial 2014


4. Now let's go to our Blogger account.
5. Look for your blog and click on it, then go to Template > click the Edit HTML button and paste the code previously generated in Analytics before the </head> tag (CTRL + F in order to find it).

And this would be the entire procedure. Within about 24 hours, we shall see the first statistics of our blog in Google Analytics, otherwise check the following:

- Double check that the code has no spaces or characters.
- Doesn't have errors in the configuration
- There are no poor implementation of the filters.
- The Flash plugin is working or javascript is enabled.
- You will have minor issues if you are receiving visits from China (this conflict is not yet solved, according to Google).