Showing posts with label Pc Tricks. Show all posts

How to Instal Windows 8 Complete With Simple Steps in PC 2014 postheadericon

Hwo to Instal Windows 8 With Simple Steps in PC 2014
Windows 8 is Microsoft's latest operating system which is completely redesigned. It moves away from the traditional interface to a completely new interface known as Metro User Interface. The familiar start menu is now gone. Icons and windows are replaced with live tiles and magazine styled interface. Unlike any previous versions, Windows 8 and its variation RT works across multiple architectures and has been optimized for touch screen. So it will work on Intel based PCs or an ARM based tablet.


This step-by-step guide demonstrates how to install Microsoft Windows 8 Professional. You can follow this guide if you have Windows 8 basic edition or any other version as the steps are very similar.
The best way to install Windows 8 is to do a clean install. Before you start the installation process I recommend that you check Windows 8 System Requirements to ensure that your hardware is supported by Windows 8. If you don't have Windows 8 drivers for all your hardware, it is a good idea to download all the drivers from the hardware manufacturers web site and save all the necessary drivers on a CD/DVD or a USB drive before you start the installation.
Windows 8 Professional DVD is bootable. In order to boot from the DVD you need to set the boot sequence. Look for the boot sequence under your BIOS setup and make sure that the first boot device is set to CD-ROM/DVD-ROM.

Step 1 - Place Windows 8 DVD in your dvd-rom drive and start your PC. Windows 8 will start to boot up and you will get the following screen with a rotating progress bar.
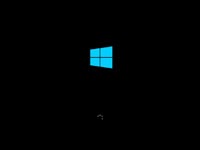
Windows 8 Complete Teck92

Step 2 - The next screen allows you to setup your language, time and currency format, keyboard or input method. Choose your required settings and click next to continue.
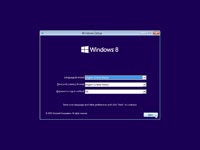
Windows 8 Complete Teck92

Step 3 - The next screen allows you to install or repair Windows 8. Since we are doing a clean install we will click on "install now".
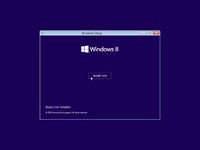
Windows 8 Complete Teck92


Step 4 - The setup process starts as shown.

Windows 8 Complete Teck92


Step 5 - At this stage you need to type your product key that came with your copy of Windows 8. Click next once you have entered the product key correctly.
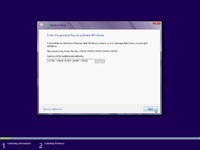
Windows 8 Complete Teck92


Step 6 - Read the license terms and tick I accept license terms. Then click next to continue.
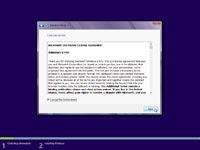
Windows 8 Complete Teck92


Step 7 - Choose the type of installation you want. Since you are doing a clean install you need to click on custom.
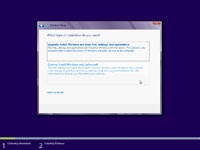
Windows 8 Complete Teck92


Step 8 - Choose where you would like to install Windows 8. If you have one hard drive you will get an option similar to the image below. You can click next to continue then go to step 12.
If you have more than one drive or partition then you need to select the appropriate drive and click next. At this stage you can go to step 12.
If you want to partition a large drive then do not click next. Go to step 9.
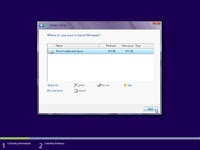
Windows 8 Complete Teck92


Step 9 - If you want to partition an existing drive then click new. Choose the size of the partition and click apply.
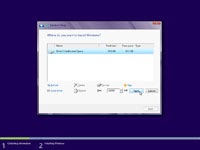
Windows 8 Complete Teck92


Step 10 - Click OK to create the partition. Windows will create additional system partition which you don't have to worry about.
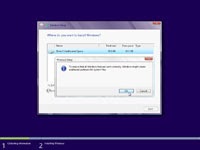
Windows 8 Complete Teck92


Step 11 - You will notice that you have 3 partitions. Partition 1 is system reserved. Leave this partition alone. Partition 2 is 30GB primary partition that was created in the last step. The third partition is unallocated which means it is not being used. You can however format it and use it as a second storage drive. This can be done after windows installation is finished so I will leave it for now.
Choose partition 2 (Primary Partition). This is where I will install Windows 8. Click next to continue.
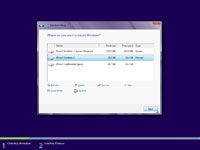
Windows 8 Complete Teck92

Step 12 - At this stage Windows starts to copy files to your hard drive and begins the installation. This process might take a few minutes depending on your computer specification. Now is a good time to grab yourself a coffee.
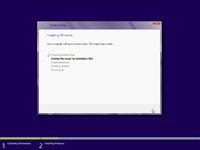
Windows 8 Complete Teck92


Step 13 - When all the necessary files are copied Windows 8 will automatically restart as shown.
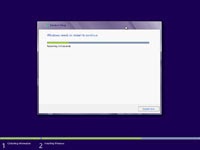
Windows 8 Complete Teck92


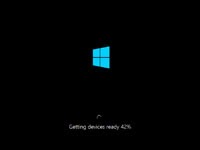
Step 14 - You will go through various progress bar and information messages as shown on the following images. Windows might restart automatically second time.
Windows 8 Complete Teck92

Windows 8 Complete Teck92

Windows 8 Complete Teck92


Step 15 - You are now presented with "Let's go through a few basics" screen. It will automatically select personalize option.
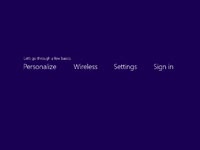
Windows 8 Complete Teck92


Step 16 - Choose your PC name and personalize the color.
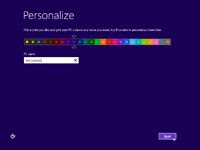
Windows 8 Complete Teck92


Step 17 - Here you can choose express settings or choose customize. I will choose customize to make further customization.
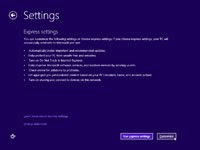
Windows 8 Complete Teck92


Step 18 - Choose Yes, turn on sharing and connect to devices.
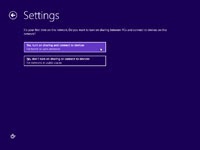
Windows 8 Complete Teck92


Step 19 - Help protect and update your PC. Choose your preferred option and click next.
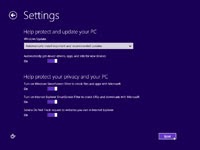
Windows 8 Complete Teck92


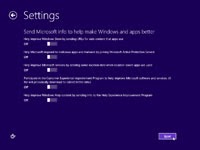
Step 20 - Send Microsoft info to help make Windows and apps better. Choose your preferred options or leave the default settings. Click next to continue.
Windows 8 Complete Teck92


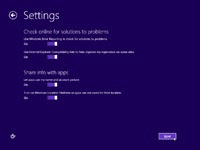
Step 21 - Check online for solutions to problem. Choose your preferred options or leave the default settings. Click next to continue.
Windows 8 Complete Teck92


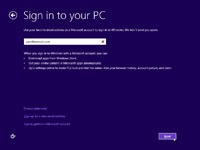
Step 22 - Sign in to your PC. Here you can login to your PC using a Microsoft email account such as your hotmail account.
If you do not have a Microsoft account you can create one by clicking Sign up for a new email address. Go to Step 23.
If you don't want to create an email account and prefer to create a local user name, click Sign in without a Microsoft account. Go to step 24.
Windows 8 Complete Teck92


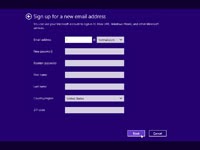
Step 23 - Sign up for a new email address. If you want to create a new email account you need to complete the form below
Windows 8 Complete Teck92


Step 24 - Click local account 


Windows 8 Complete Teck92


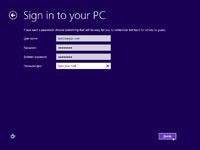
Step 25 - Here you can choose a local user name and password. Choose finish to continue.
Windows 8 Complete Teck92


Step 26 - At this stage Windows starts to finalize your settings. You will get the following information screen as the installation moves forward.

Windows 8 Complete Teck92

Windows 8 Complete Teck92

Windows 8 Complete Teck92


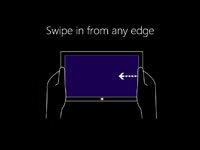
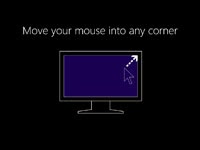
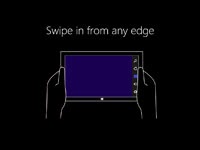
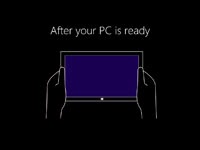
Step 27 - As Windows 8 setup progresses you are given a presentation of the new interface. Its shows you how swiping the edge of the screen brings up the Charm bar. Using the Charm bar you can do a search or change your settings. It also demonstrates how you can hover your mouse on the bottom or top left corner to access the switch list. This list shows all open applications and allows you to switch between them.
Windows 8 Complete Teck92

Windows 8 Complete Teck92

Windows 8 Complete Teck92

Windows 8 Complete Teck92


Step 28 - Soon as the demonstration finishes windows moves into the final stages of the setup.

Windows 8 Complete Teck92

Windows 8 Complete Teck92


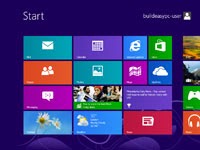
Step 29 - Finally the setup process is finished and you are presented with a completely new and unfamiliar Metro user interface. You have your most common application right in front of you. Clicking on any tiles will launch that application. At this point you can start using your computer. However, it may not be fully configured. You need to make sure that all the hardware is detected correctly and the necessary device drivers are installed. This can be done from the device manager.
Windows 8 Complete Teck92


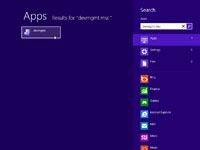
Step 30 - To go to device manager click search on charm bar on the right. Then type devmgmt.msc. Click on the devmgmt icon on the left.
Windows 8 Complete Teck92


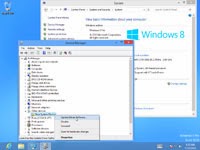
Step 31 - You will see all your hardware listed as shown on the image below. You need to check if you have any yellow exclamation marks next to the name of the devices, similar to "Base System Device" on the image below. This indicates that the driver has not been installed for this device.
At this stage you can install the driver for this device. To do so, Right Mouse click on Base System Device -> Update Driver Software...
Windows 8 Complete Teck92


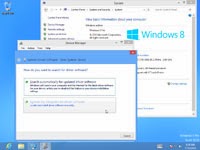
Step 32 - You can choose to "Search automatically for updated driver software" or "Browse my computer for driver software". If you have the driver CD or if the driver is on a USB drive then choose "browse my computer for driver software". Window 8 will search and install the driver from the CD or you can locate the driver manually.
Once you have removed all the yellow exclamation marks from the device manager your Windows 8 configuration would be fully complete.
Windows 8 Complete Teck92


 This Post Written By Ali Bin Rasheed For More Tricks Connect With Us :)

Idm Fake Serial Key Solution 2014 Solvet it postheadericon

Idm Fake Serial Key Solution 2014 Solvet it


Idm Fake Serial Key Solution 2014 Solvet it

IDM Fake serial key Problem

IDM (internet download manager) is one of the best available Download manager. Light weight, easy to use and good downloading speed are some of its prominent features which makes him totally unique and powerful among other competitors. You can download IDM from their official website as a 30 days trial version which is free but you have to pay for full version. A lot of people face problem of Fake serial key when they uninstall IDM after using of 30 days trial version and try to install it again so that they can use it again for a month . But the newly installed idm not work for them and they end up in receiving an error of “your idm has been registered through fake serial number or the serial key number has been blocked, IDM exiting”. For to solve this problem, people install new operating system so that IDM won’t show Fake serial key problem, and this method works. But installing operating system after every 30 days isn’t good; most of the people don’t like it. In this post I’ll tell you how you can resolve idm fake serial key problem without installing a new operating system. Without further ado let’s get started.

Solution of IDM Fake serial key problem

1- Open run dialog box and type Regedit then press enter. You can open run dialog box by pressing windows +R key on your keyboard.
2) Now go to HKEY_CURRENT_USER–>SOFTWARE–>Download Manager, then Delete the complete Download Manager folder.

Idm Fake Serial Key Solution 2014 Solvet it
 3) Now go to control panel, and uninstall the IDM.
4) Restart your computer.
5)  Install latest version of IDM, you can download it from their Official website.
And the problem is resolved now you can’t see again weird Fake serial key error . You have to follow the above step in orderly manner otherwise your problem won’t resolve. If you have any question to ask the leave your question in the comment below, we really appreciate it.

How to Reset Or Recover Your Lost Window 7 Password? postheadericon

Recover Your Lost Window 7 Password

Forgetting your password is never any fun, but luckily there’s a really easy way to reset the password. Don't worry about that. In this article, I will show you the easy way to create a Windows 7 password reset disk.

How to create a Password Recovery Tool for Windows 7:

If you haven’t forgotten your Windows 7 password yet. At this situation, you can easily make such a password reset USB disc for free to prevent your computer from being locked.
Now follow the below easy steps:


  • Insert the prepared USB flash drive into your computer.

    1. Type “Reset” in the Windows search box and select “Create a password reset disk”. 
    2. When the “Forgotten Password Wizard” appears, click “Next”.
    3. Select your USB flash drive and click “Next”.
    4. Once the wizard finishes creating the reset disk, click “Next” then “Finish”.
    5. That's it. Job Done!
    Hot to Recover Your Lost Windows 7 Password: 

    Forgetting your password is never any fun, but luckily there’s a really easy way to reset the password. If you have already forgotten your Windows 7 password. Many computer users actually didn’t take any precautions against Windows 7 password forgotten problem before they find they’ve lost or forgotten the password. So if you don’t have such a password reset disk when you forget or lose your Windows 7 password, you need to seek for other ways to make one and then use that to reset Windows 7 password.

    Here’s how to create a reset password Windows 7 USB with Windows Password Recovery Enhance:

    You need to do the below steps in another system in order to recover your system.
    1. Download and install PC Login Now's iso file.
    2. Burn the ISO file to CD (Use Magic ISO).
    3. After you have created a bootable disk, Insert that disk into the DVD Drive and Restart your computer.
    4. Set the BIOS to boot from CD. (Mostly not required if your system automatically detects the disk on your DVD Drive).
    5. After that the software will automatically runs.
    6. Use PCLoginNow to finish the job.

    How To Shut Down Your Friend PC Using Command Prompt (cmd)? postheadericon

    How To Shut Down Your Friend PC Using Command Prompt (cmd)?

    ShutDown Pc With Command Prompt (Cmd)

    Hello friends. Today your’s mafiyaboy is here with a cool trick. You can shutdown your friend’s computer through chating. This is very simple and cool trick. Kindly follow these steps :-
     
    Step 1: Before going to start clear all history, all cookies, stop all downloading and close all extra tabs. Mean to say stop all internet activities. Now go to your messanger and start chating with the victim.

    Step 2: Go the start and click on run.

    Step 3: In run command type cmd.exe and hit enter.

    Step 4: A black screen will appear. This is command prompt. In this box type “netstat -n” (without quotes).

    Step 5: Now if you done the step one correctly you see only one ip address many times (ip should be of victim)
    .
    Step 6: Now again, type “shutdown -i”(without quotes).A box will appear now click on add button.A small box will pop up. Now type ip address of computer which you get from “netstat -n” command.

    Step 7: Now there are three options click on shutdown.

    Step 8: To  show a message to victim’s computer check the “warm users of the action” and set the number of seconds.

    Step 9: Now select any option in shutdown event tracker.

    Step 10: Now comes the best part of the prank. In last type your message like you got hacked and we destroy your computer. After this shutdown your computer is not going to start(type anything that scare your victim)

    How To Change Any Drive Background Without Software 2014? postheadericon

    How To Change Any Drive BackGround Without Software 2014?

    We all might have set background images for the Local drives in Windows XP. But you might not have set background picture for your pendrive. It’s a very simple hack so give it a try after reading this post, All you need to do is, just Copy & Paste the below code to notepad, then save it as desktop.ini

    [.ShellClassInfo]
    IconFile=%SystemRoot%system32SHELL32.dll
    IconIndex=127
    ConfirmFileOp=0

    [{BE098140-A513-11D0-A3A4-00C04FD706EC}]
    Attributes=1
    IconArea_Image=”YourPictureName.jpg”
    IconArea_Text=”0xFFFFFF”
    VeBRA sources – don’t delete the tag above, it’s there for XXXXX purposes -
    [ExtShellFolderViews]
    {BE098140-A513-11D0-A3A4-00C04FD706EC}={BE098140-A513-11D0-A3A4-00C04FD706EC}
    {5984FFE0-28D4-11CF-AE66-08002B2E1262}={5984FFE0-28D4-11CF-AE66-08002B2E1262}

    [{5984FFE0-28D4-11CF-AE66-08002B2E1262}]
    PersistMoniker=Folder.htt
    PersistMonikerPreview=%WebDir%folder.bmp


    Some Information On Above Code:
    Where YourPictureName.jpg” is, delete that and replace with your picture name for exampleabc.jpg

    Note:
    • Please check that Picture format (.jpg , .bmp, .gif) properly else this hack won’t work.
    • If your Picture is white colour then folder names will not be clear so change the IconArea_Text=0xFFFFFF to IconArea_Text=”0x000000
    • Save the notepad as “desktop.ini”.
    • Place both your notepad file (i.e) desktop.ini and your picture in Pendrive.
    • Set the above files attributes as Hidden.
    • Refresh(F5) and Enjoy with your new background.
    • You can also this on your windows Xp Local drives(C,D,E,F).
      IF above Code Not Work Then Try This 
    [ExtshellFolderViews]
    {BE098140-A513-11D0-A3A4-00C04FD706EC}={BE098140-A513-11D0-A3A4-00C04FD706EC}
    [{BE098140-A513-11D0-A3A4-00C04FD706EC}]
    IconArea_Image=test1.jpg


    103 Run Commands in Pc 2014 postheadericon

    103 Run Commands in Pc 2014

    Type Any Command In Run
    1) Accessibility Controls
    - access.cpl
    2) Accessibility Wizard
    - accwiz
    3) Add Hardware Wizard
    - hadwwiz.cpl
    4) Add/Remove Programs
    - appwiz.cpl
    5) Administrative Tools
    - control admintools
    6) Automatic Updates
    - wuaucpl.cpl
    7) Bluetooth Transfer Wizard
    - fsquirt
    Part-2
    8) Calculator
    - calc
    9) Certificate Manager
    - certmgr.msc
    10) Character Map
    - charmap
    11) Check Disk Utility
    - chkdsk
    12) Clipboard Viewer
    - clipbrd
    13) Command Prompt
    - cmd
    14) Component Services
    - dcomcnfg
    15) Computer Management
    - compmgmt.msc
    Part-3
    16. Disk Cleanup Utility
    - cleanmgr
    17. Disk Defragment
    - dfrg.msc
    18. Disk Management
    - diskmgmt.msc
    19. Disk Partition Manager
    - diskpart
    20. Display Properties
    - control desktop
    21. Display Properties
    - desk.cpl
    22. Dr.Watson System Troubleshooting Utility
    - drwtsn32
    23. Driver Verifier Utility
    - verifier
    24. Event Viewer
    - eventvwr.msc
    25. Files and Settings Transfer Tool
    - migwiz
    Part-4
    26) Files and Settings Transfer Tool
    - migwiz
    27) File Signature Verification Tool
    - sigverif
    28) Findfast
    - findfast.cpl
    Part-5
    29) Firefox
    - firefox
    30) Folder Properties
    - control folders
    31) Fonts
    - control fonts
    32) Fonts Folder
    - fonts
    33) Free Cell Card Game
    - freecell
    34) Game Controllers
    - joy.cpl
    35) Group Policy Editor (for xp professional)
    - gpedit.msc
    36) Hearts Card Game
    - mshearts
    Part-6
    37) Help and Support
    - helpctr
    38) HyperTerminal
    - hypertrm
    39) Iexpress Wizard
    - iexpress
    40) Indexing Service
    - ciadv.msc
    41) Internet Connection Wizard
    - icwconn1
    42) Internet Explorer
    - iexplore
    43) Internet Properties
    - inetcpl.cpl
    Part-7
    44. Keyboard Properties
    - control keyboard
    45. Local Security Settings
    - secpol.msc
    46. Local Users and Groups
    - lusrmgr.msc
    47. Logs You Out of Windows
    - logoff
    48. Malicious Software Removal Tool
    - mrt
    49. Microsoft Chat
    - winchat
    50. Microsoft Movie Maker
    - moviemk
    Part-8
    51. Microsoft Paint
    - mspaint
    52. Microsoft Syncronization Tool
    - mobsync
    53. Minesweeper Game
    - winmine
    54. Mouse Properties
    - control mouse
    55. Mouse Properties
    - main.cpl
    56. Netmeeting
    - conf
    57. Network Connections
    - control netconnections
    Part-9
    58. Network Connections
    - ncpa.cpl
    59. Network Setup Wizard
    - netsetup.cpl
    60. Notepad
    - notepad
    61) Object Packager
    - packager
    Part-10
    62. ODBC Data Source Administrator
    - odbccp32.cpl
    63. On Screen Keyboard
    - osk
    64. Outlook Express
    - msimn
    65. Paint
    - pbrush
    66. Password Properties
    - password.cpl
    67. Performance Monitor
    - perfmon.msc
    68. Performance Monitor
    - perfmon
    Part-11
    69. Phone and Modem Options
    - telephon.cpl
    70. Phone Dialer
    - dialer
    71. Pinball Game
    - pinball
    72. Power Configuration
    - powercfg.cpl
    73. Printers and Faxes
    - control printers
    74. Printers Folder
    - printers
    75. Regional Settings
    - intl.cpl
    Part-12
    76. Registry Editor
    - regedit
    77. Registry Editor
    - regedit32
    78. Remote Access Phonebook
    - rasphone
    79. Remote Desktop
    - mstsc
    80. Removable Storage
    - ntmsmgr.msc
    81. Removable Storage Operator Requests
    - ntmsmgr.msc
    Part-13
    82. Resultant Set of Policy (for xp professional)
    - rsop.msc
    83. Scanners and Cameras
    - sticpl.cpl
    84. Scheduled Tasks
    - control schedtasks
    85. Security Center
    - wscui.cpl
    86. Services
    - services.msc
    87. Shared Folders
    - fsmgmt.msc
    88. ShutDown Windows
    - shutdown
    Part-14
    89.Sounds and Audio
    - mmsys.cpl
    90.Spider Solitare Card Game
    - spider
    91. SQL Client Configuration
    - cliconfg
    92. System Configuration Editor
    - sysedit
    93. System Configuration Utility
    - msconfig
    94. System Information
    - msinfo32
    95. System Properties
    - sysdm.cpl
    Part-15
    96.Task Manager
    - taskmgr
    97.TCP Tester
    - tcptest
    98.Telnet Client
    - telnet
    99.User Account Management
    - nusrmgr.cpl
    100.Utility Manager
    - utilman
    101.Windows Address Book
    - wab
    102.Windows Address Book Import Utility
    - wabmig
    103. Windows Explorer
    - explorer

    Change Windows Startup And Shutdown Music Easily postheadericon

    Change Windows Startup And Shutdown Music Easily

    I personally hate the default Windows startup and shutdown sounds, they are just plain loud and annoying! I changed mine a long time ago and since someone asked me how to do this recently, I thought I would go through the steps in order to change the Windows login and logoff sounds.
    Interestingly, you can also change other sounds in Windows, such as the empty recycle bin sound, the new hardware insert sound, the error sound and lots more! You can take an MP3 of your favorite artist, convert it into WAV format and then use it to replace the default Windows sound.
    You can use a freeware program like JetAudio to convert audio files into WAV format. The only thing you’ll need to keep in mind is that you want to keep the size of the file quite small, less than 500KB if possible. So you may need to first take an MP3 and cut out only the portion you want. You can use an audio editing program like Audacity to chop up the music.
    Step 1: Find a song and convert it to WAV format. Try to keep the file size small, max at 1MB if you must.
    Step 2: Now you need to rename these files to Windows XP Startup.wav and Windows XP Shutdown.wav respectively.
    Step 3: Now we’ll go ahead and navigate to the folder with the current startup and shutdown Windows sounds. Go to My Computer and go to C:\Windows\Media. Here you will find the files Windows XP Startup.wav and Windows XP Shutdown.wav along with a bunch of other Windows sounds.


    Go ahead and move the two original files from the Media folder to some other backup folder. This is just in case the two WAV files you created do not work and you want to revert back to the original sound.
    Step 4: Now copy the two renamed files to the C:\Windows\Media folder and restart your computer! You should now hear the new music, songs, or sounds play rather than the default sound.
    If you don’t like some of the other default Windows sounds, you can change them also in the same manner. Just create a file that is named the exact same as the one in the Media folder and then either replace it or move the original and then put in your new one!
    Overall, it’s really simple to change the Windows login and logoff sounds, so it’s something most people will be able to do! Also, there’s no real way you can “harm” or “mess up” your computer.
    Enjoy!